
Table of Contents
ToggleIntroduction
# Importance of drop-down lists in Excel
Excel drop-down lists are a powerful feature that enables users to select a value from a predefined list of options within a cell.
These lists offer a structured way to input data, presenting users with a menu of choices to select from, enhancing data entry efficiency and accuracy.
They are commonly used in various applications such as creating data entry forms, surveys, inventory management systems, and more.
# Overview of Excel drop-down lists
Data validation is a critical aspect of maintaining data integrity and accuracy in Excel.
When applied to drop-down lists, data validation ensures that users input only valid and relevant data by restricting choices to predefined options.
By enforcing data validation through drop-down lists, Excel users can minimize errors, standardize data entry, and improve the overall quality of their spreadsheets.
Excel Drop-Down Lists Basics
# Definition and Purpose of Excel Drop Down List.
Excel drop-down lists are like menus in a restaurant. They provide a set of options for users to choose from when entering data into a cell.
Their purpose is to make data entry easier and more accurate by giving users a limited set of choices to select from, reducing errors and ensuring consistency.
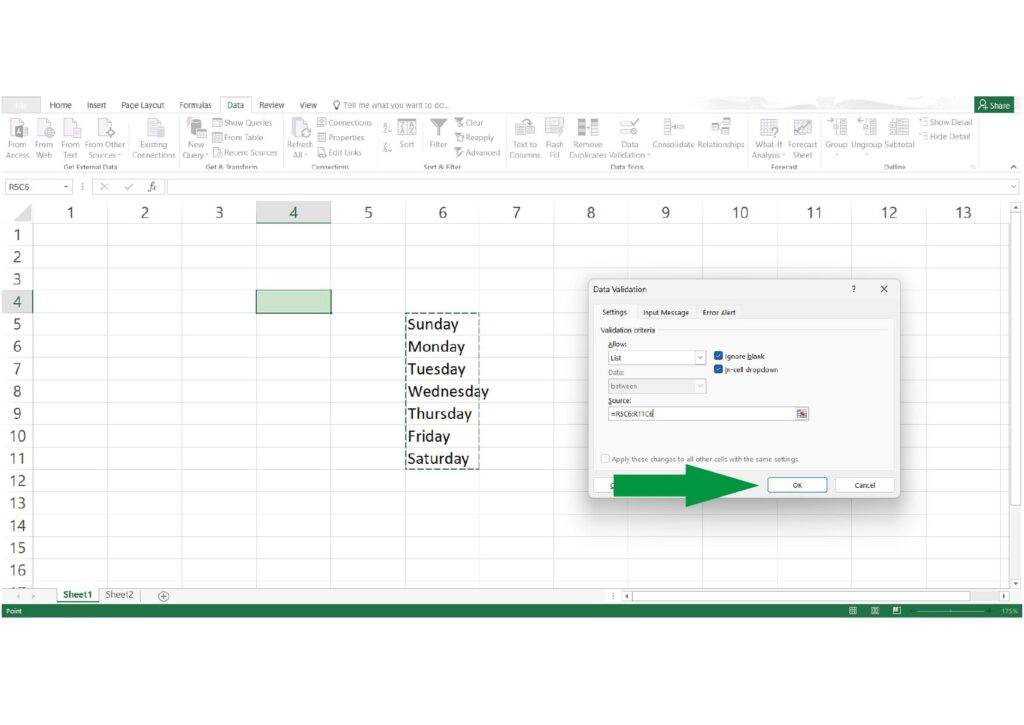
# Create Drop Down list in excel Step-by-Step Basic Guide :
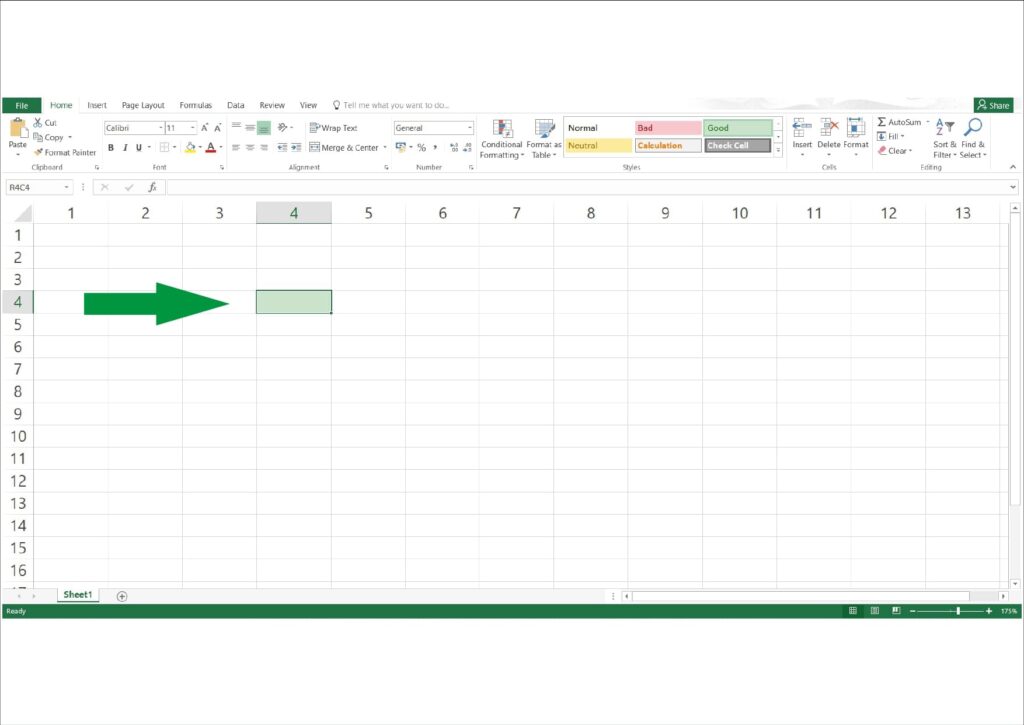
1.Select the cell or cells where you want the drop-down list.
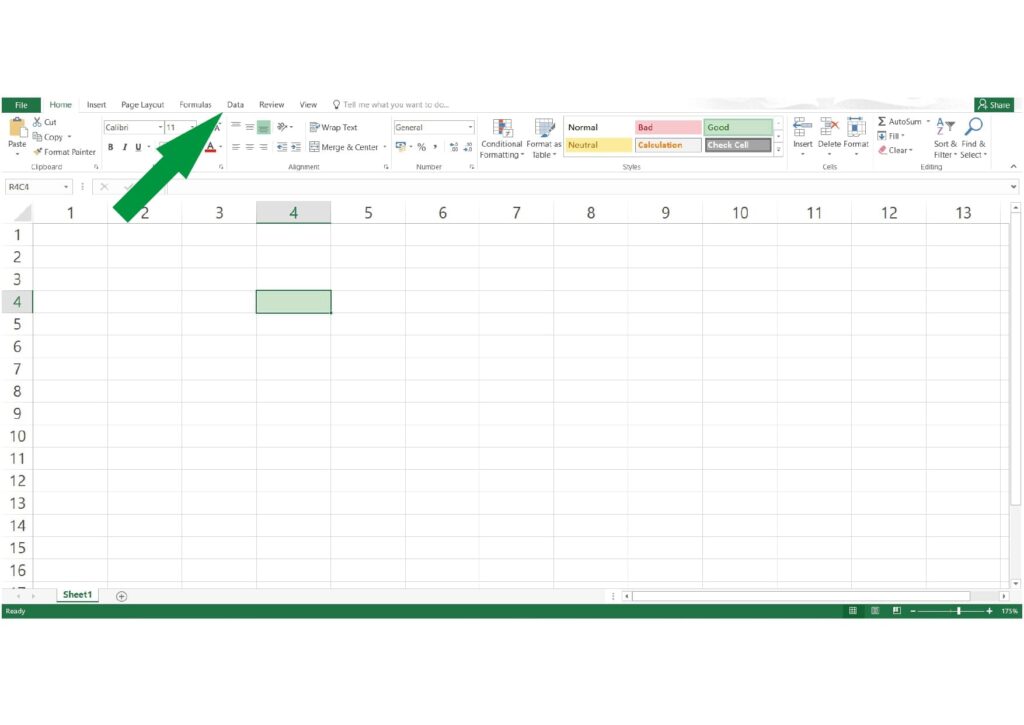
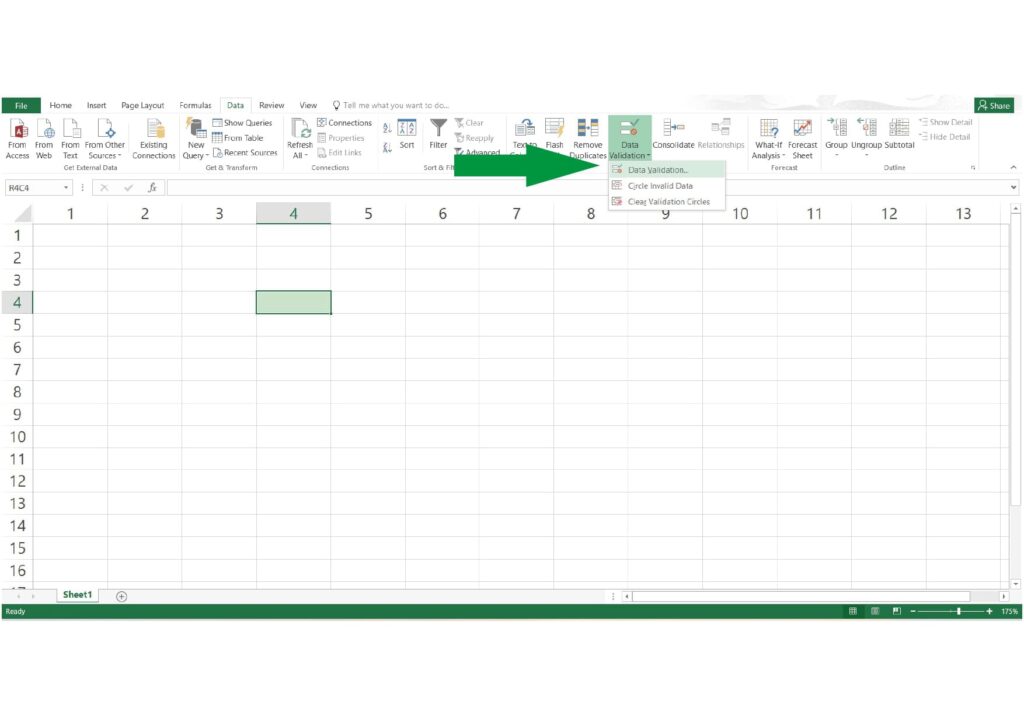
2. Go to the “Data” tab on the Excel ribbon.
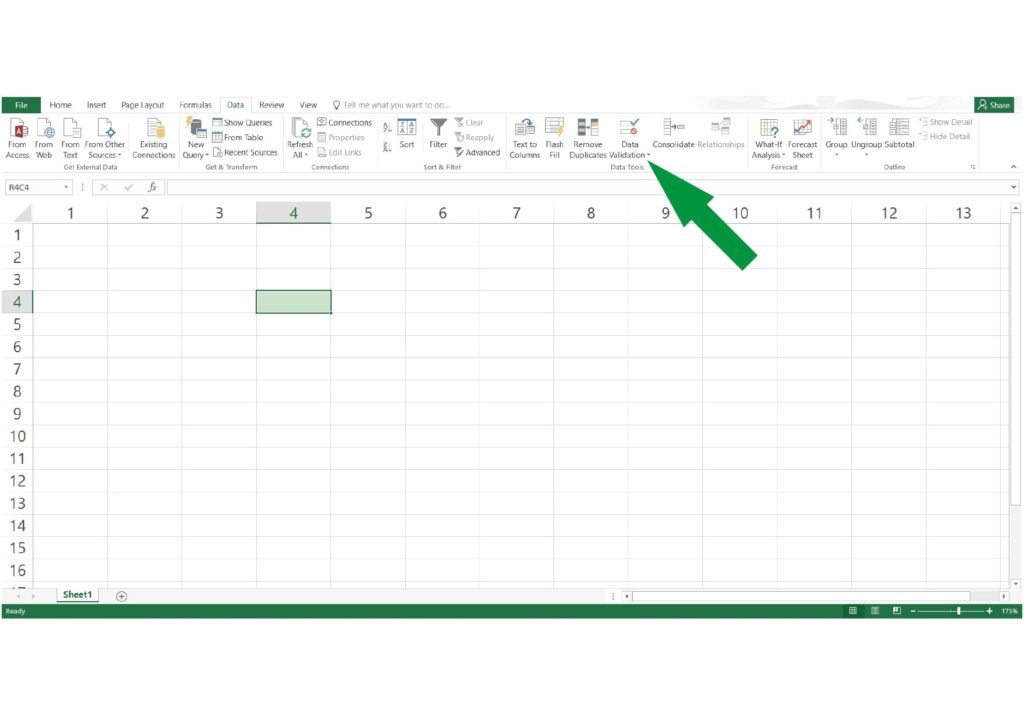
3. Click on “Data Validation” in the “Data Tools” group.
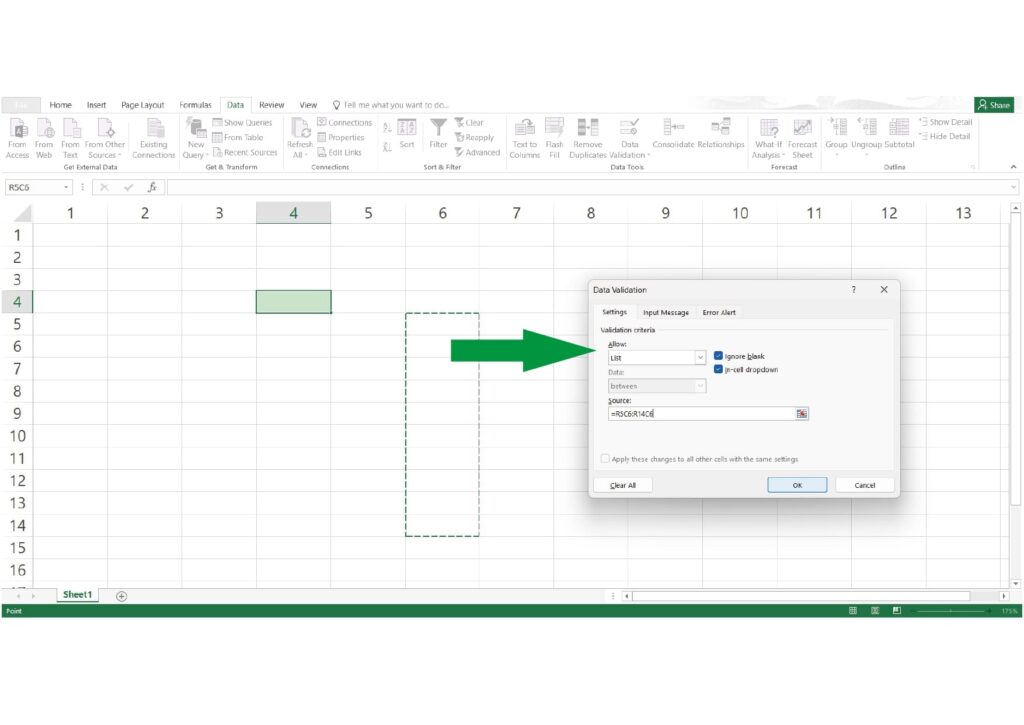
4. In the Data Validation dialog box, under the “Settings” tab, select “List” from the “Allow” dropdown menu.
5. In the “Source” box, type the list of options you want in your drop-down list, separated by commas.
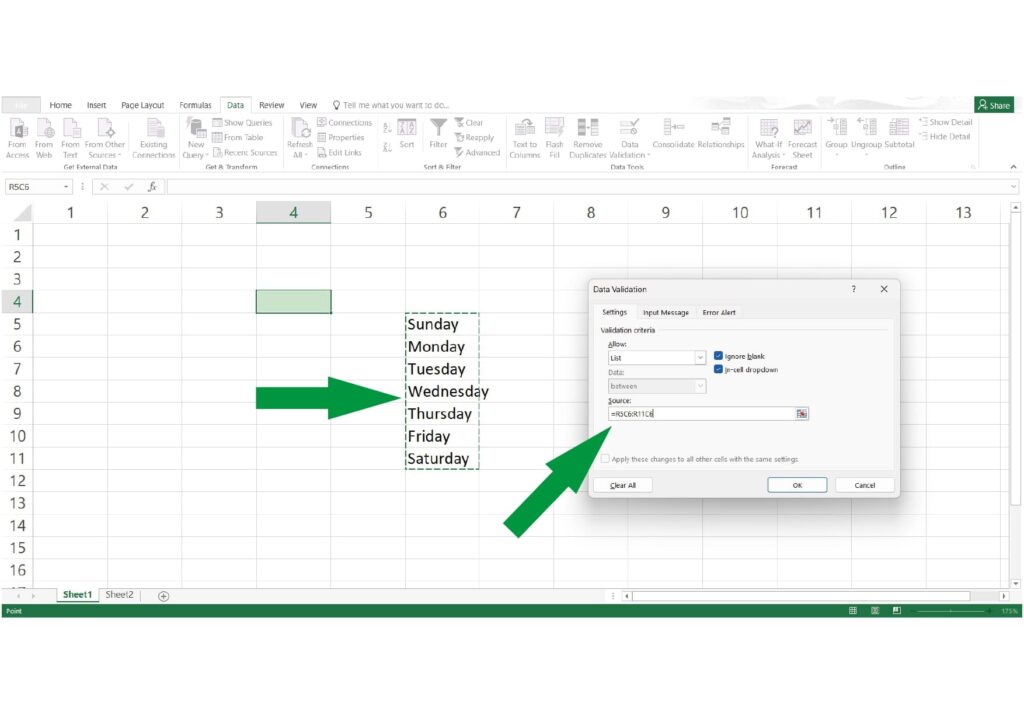
6. Optionally, you can select “Cell Range” and specify a range of cells containing the list of options.
7. Click on the “drop-down button“.
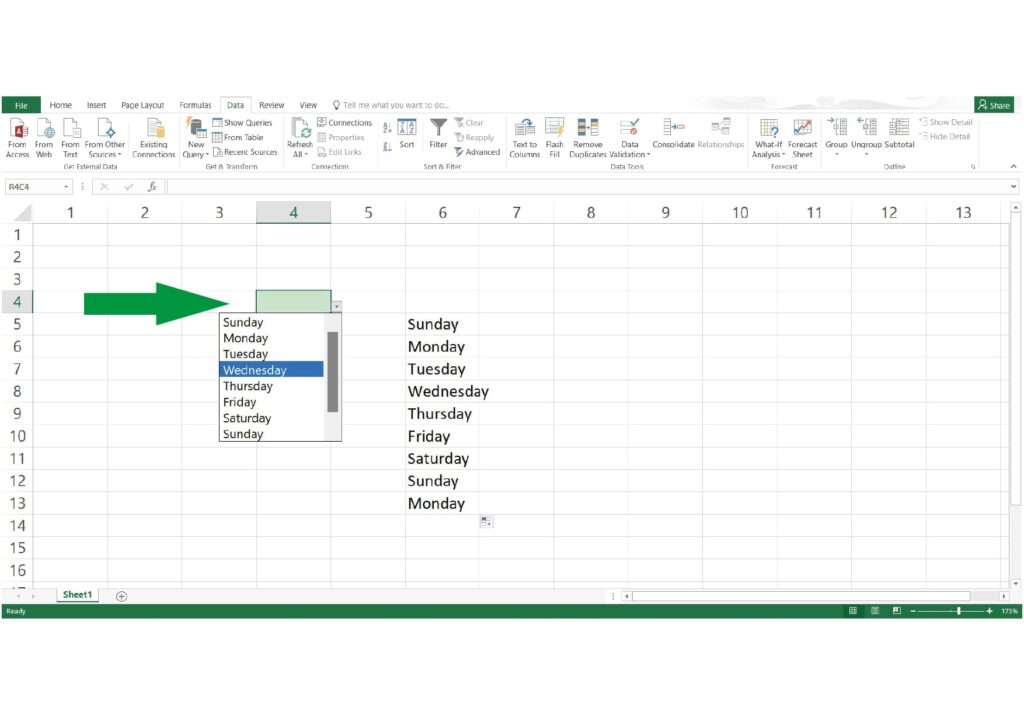
8. Click “OK” to apply the drop-down list to the selected cells.
# Simple Tips for Effective Use of Drop-Down Lists
Keep your list of options short and relevant to make it easier for users to choose.
Make sure your drop-down lists are easy to find and use by positioning them near the cells where data entry is required.
Consider using data validation to prevent users from typing in values that are not in the list, ensuring data accuracy.
Drop-Down List Tips for Efficiency
# Time-saving techniques for creating and managing drop-down lists
Save time by using Excel’s built-in tools to create drop-down lists automatically.
Manage your lists efficiently by organizing them with Excel’s Name Manager feature.
Copy and paste drop-down lists to quickly apply them to multiple cells or ranges.
# Customization options and formatting tips
Customize the appearance of your drop-down lists by changing font styles, colors, and borders.
Experiment with different list styles such as dropdown arrows or combo boxes to find what works best for your spreadsheet.
Apply conditional formatting to highlight specific options in your drop-down lists based on certain criteria.
# Shortcuts for faster data entry using drop-down lists
Use keyboard shortcuts like Alt + Down Arrow to open drop-down lists without using your mouse.
Quickly access the Data Validation dialog box by pressing Alt + N + V to make changes to your drop-down lists.
Enable AutoComplete to speed up data entry by allowing Excel to suggest and complete entries based on previous inputs.
Excel Data Validation Essentials
# Understanding the concept of data validation in Excel
Data validation in Excel refers to the process of controlling and restricting the type and format of data that users can enter into cells.
It helps maintain data integrity by ensuring that only valid and relevant data is inputted, reducing errors and inconsistencies in spreadsheets.
Data validation can enforce rules and criteria such as numeric ranges, date formats, text lengths, and the use of drop-down lists.
# How to apply data validation to drop-down lists
- To apply data validation to drop-down lists, select the cell or cells where you want the drop-down lists to appear.
- Navigate to the “Data” tab on the Excel ribbon and click on “Data Validation” in the “Data Tools” group.
- In the Data Validation dialog box, under the “Settings” tab, select “List” from the “Allow” dropdown menu.
- In the “Source” box, specify the range of cells containing the list of options or type the list directly into the box.
- Optionally, you can set additional validation criteria such as allowing only values from the list or rejecting duplicates.
# Best practices for ensuring data accuracy with validation
- Keep drop-down lists concise and relevant to the context to prevent user confusion.
- Regularly review and update drop-down lists to ensure they remain accurate and up-to-date.
- Use descriptive and clear labels for each option in the drop-down lists to improve user understanding.
- Consider implementing data validation rules beyond drop-down lists, such as numeric ranges or date restrictions, to further enhance data accuracy and consistency.
Advanced Excel Techniques with Drop-Down Lists
# Exploring dynamic drop-down lists and their benefits
Dynamic drop-down lists in Excel are interactive lists that change based on certain criteria or conditions.
These lists offer flexibility and adaptability, as they can update automatically when the underlying data changes.
Benefits of dynamic drop-down lists include improved efficiency, reduced data entry errors, and enhanced user experience.
# Advanced data validation techniques using formulas
Excel allows for more sophisticated data validation rules using formulas.
Formulas can be used to create dynamic validation criteria based on the values in other cells or conditions in the spreadsheet.
Advanced data validation techniques with formulas enable users to implement complex logic and constraints, ensuring data accuracy and integrity.
# Creating dependent drop-down lists for more complex scenarios
Dependent drop-down lists are interconnected lists where the options in one list depend on the selection made in another.
These lists are useful for handling hierarchical data or categorizing information into multiple levels.
Creating dependent drop-down lists involves setting up formulas or using named ranges to dynamically populate the options based on the selection in the parent list.
Streamlining Excel Data Entry
# Tips for efficient data entry using drop-down lists
Utilize drop-down lists to provide users with predefined options for data entry, reducing the need for manual typing.
Keep drop-down lists concise and relevant to the context to streamline the selection process and minimize errors.
Position drop-down lists strategically within the spreadsheet to ensure easy access and efficient data entry.
# Managing large datasets with drop-down lists
Break down large datasets into manageable chunks and use drop-down lists to input data systematically.
Organize drop-down lists hierarchically to categorize information and facilitate navigation within the dataset.
Consider using dynamic drop-down lists to handle large datasets that may change or expand over time.
# Techniques for improving data entry accuracy
Implement data validation rules with drop-down lists to restrict entries to predefined options, reducing the risk of errors.
Enable error-checking features in Excel to identify and correct data entry mistakes automatically.
Regularly review and validate data entered using drop-down lists to ensure accuracy and consistency throughout the spreadsheet.
Excel Data Management Strategies
# Organizing and categorizing data using drop-down lists
Utilize drop-down lists to categorize and organize data systematically within your Excel spreadsheet.
Create drop-down lists for categorical variables such as product categories, regions, or departments to standardize data entry and ensure consistency.
Use hierarchical drop-down lists to organize data into multiple levels, making it easier to navigate and analyze.
# Managing data consistency and integrity with drop-down lists
Enforce data validation rules with drop-down lists to maintain consistency and integrity in your dataset.
Set validation criteria to allow only values from the drop-down list, preventing users from entering invalid or incorrect data.
Regularly review and update drop-down lists to reflect changes in the dataset and ensure that they remain accurate and up-to-date.
# Handling data updates and changes effectively
When updating or changing data in your spreadsheet, consider the impact on existing drop-down lists and validation rules.
Update drop-down lists accordingly to reflect changes in data categories or options.
Communicate any updates or changes to users who may be interacting with the spreadsheet to ensure they are aware of any modifications to the data entry process.
Excel Tips and Tricks for Productivity
# Hidden features and shortcuts for Excel drop-down lists
Explore lesser-known features and shortcuts in Excel to maximize efficiency when working with drop-down lists.
Learn keyboard shortcuts such as Alt + Down Arrow to quickly open drop-down lists without using the mouse.
Discover hidden features like AutoComplete, which suggests and completes entries based on previously typed values, speeding up data entry.
# Customization options for enhancing user experience
Customize the appearance and behavior of drop-down lists to improve user interaction and satisfaction.
Experiment with different list styles, fonts, colors, and borders to match the design of your spreadsheet.
Enhance user experience by adding clear and descriptive labels to drop-down list options, making it easier for users to understand their choices.
# Creative uses of drop-down lists for improved workflow efficiency
Think outside the box and explore creative ways to leverage drop-down lists for improved workflow efficiency.
Use drop-down lists to create interactive forms, surveys, or questionnaires within your Excel spreadsheet.
Implement dynamic drop-down lists to automate repetitive tasks or streamline complex data entry processes, saving time and reducing errors.
Optimizing Workflows with Dynamic Drop-Down Lists
# Integrating dynamic drop-down lists into complex workflows
Explore how dynamic drop-down lists can be seamlessly integrated into complex workflows to enhance efficiency and productivity.
Identify key stages in your workflow where dynamic lists can streamline data entry, decision-making, or analysis processes.
Customize dynamic drop-down lists to adapt to changing data or workflow requirements, ensuring flexibility and adaptability.
# Automation possibilities with dynamic lists in Excel
Leverage the power of dynamic drop-down lists to automate repetitive tasks and reduce manual intervention in Excel workflows.
Explore automation techniques such as using formulas, macros, or VBA (Visual Basic for Applications) to dynamically update drop-down lists based on changing conditions.
Implement automated processes to populate dynamic drop-down lists with updated data from external sources or databases, ensuring real-time accuracy and consistency.
# Examples of dynamic drop-down list applications in real-world scenarios
Discover practical examples of how dynamic drop-down lists can be applied in various real-world scenarios to optimize workflows.
Explore use cases such as inventory management systems, project tracking tools, or customer relationship management (CRM) databases, where dynamic lists facilitate efficient data entry and analysis.
Learn from case studies or success stories showcasing the benefits of using dynamic drop-down lists to streamline processes, improve decision-making, and drive productivity in different industries.
Conclusion
#. Recap of key points covered in the blog post
Throughout this blog post, we’ve explored various aspects of Excel drop-down lists, from basic concepts to advanced techniques.
We discussed the definition and purpose of drop-down lists, as well as their importance in data validation and management.
Tips and tricks were provided for creating, customizing, and efficiently using drop-down lists to streamline data entry and improve workflow efficiency.
Advanced techniques such as dynamic lists, data validation with formulas, and dependent drop-down lists were also covered.
# Encouragement for readers to implement the tips and techniques discussed
I encourage you to apply the tips and techniques discussed in this blog post to your own Excel projects and workflows.
By leveraging drop-down lists effectively, you can enhance data entry accuracy, streamline processes, and save valuable time in your daily tasks.
Experiment with different features and customization options to find what works best for your specific needs and preferences.
# Invitation to explore further resources for mastering Excel drop-down lists
If you’re eager to delve deeper into the world of Excel drop-down lists, there are plenty of additional resources available to help you expand your knowledge.
Consider exploring online tutorials, video tutorials, forums, and user communities dedicated to Excel tips and tricks.
Don’t hesitate to explore Excel’s built-in help resources and documentation for additional guidance on specific features and functionalities related to drop-down lists.
Frequently Asked Questions
A dynamic drop-down list is like a menu that changes based on what you’re doing. It shows different options depending on the situation or what you’ve chosen before. So, instead of seeing the same choices all the time, it adapts to what you need.
To edit a drop-down list in Excel:
- Select the cell or cells containing the drop-down list.
- Go to the “Data” tab on the Excel ribbon.
- Click on “Data Validation” in the “Data Tools” group.
- In the Data Validation dialog box, go to the “Settings” tab.
- You can edit the list of options in the “Source” field.
- Make your changes to the list.
- Click “OK” to save your changes and close the dialog box.
To link a cell value with an Excel drop-down list:
- Create a list of options in a column or row within your Excel worksheet.
- Select the cell where you want the drop-down list to appear.
- Go to the “Data” tab on the Excel ribbon.
- Click on “Data Validation” in the “Data Tools” group.
- In the Data Validation dialog box, go to the “Settings” tab.
- Choose “List” from the “Allow” drop-down menu.
- In the “Source” field, enter the range of cells containing your list of options (e.g., A1:A5).
- Click “OK” to save the settings and close the dialog box.
To remove a drop-down list in Excel:
- Select the cell or cells containing the drop-down list.
- Go to the “Data” tab on the Excel ribbon.
- Click on “Data Validation” in the “Data Tools” group.
- In the Data Validation dialog box, go to the “Settings” tab.
- Select “Clear All” in the Allow drop-down menu.
- Click “OK” to remove the drop-down list and close the dialog box.
To replace a drop-down list in Excel:
- Select the cell or cells containing the existing drop-down list.
- Go to the “Data” tab on the Excel ribbon.
- Click on “Data Validation” in the “Data Tools” group.
- In the Data Validation dialog box, go to the “Settings” tab.
- Change the “Allow” option to “List” if it’s not already selected.
- Update the “Source” field with the new range or list of options you want to use.
- Click “OK” to save your changes and close the dialog box.